Affiliate Disclosure: Some of the links in this post are affiliate links. This means we may earn a small commission if you make a purchase through these links—at no extra cost to you. We only recommend products and tools that we genuinely believe will help you with your Doberman.
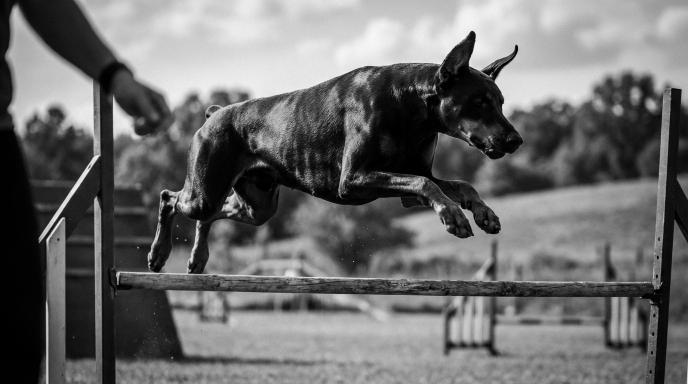
If you’ve ever watched a Doberman move—powerful, graceful, explosively fast—you’ve probably thought: “My dog would be AMAZING at agility.” You’re absolutely right. Dobermans possess the perfect trifecta for agility success: athletic ability, razor-sharp intelligence, and an intense drive to work alongside their handler.
But here’s where most Doberman owners hit a wall: You start researching agility equipment and immediately drown in options. Generic “dog agility” guides don’t address your 80-pound, high-energy, joint-sensitive breed. Amazon shows you flimsy equipment designed for 15-pound terriers. Professional sites overwhelm you with $2,000 contact equipment when you just want to start with the basics.
This guide cuts through the confusion. By the end, you’ll know exactly which equipment your Doberman needs to start agility training safely, how much you should budget, what to buy first (and what can wait), and how to avoid the expensive mistakes that cost other owners hundreds of dollars. Whether you’re eyeing backyard fun or future competitions, we’ve got you covered.
Let’s build your Doberman’s agility foundation—the smart way.
- Understanding Doberman-Specific Agility Needs
- The Essential Starter Equipment List
- Budget Breakdown: 3 Investment Tiers
- DIY vs. Commercial Equipment: Complete Comparison
- Equipment Specifications & Safety Standards
- Specific Product Recommendations & Reviews
- Space Requirements & Setup Solutions
- Safety Protocols & Injury Prevention for Dobermans
- Training Tips & Common Mistakes to Avoid
- Frequently Asked Questions
- Conclusion & Next Steps
Understanding Doberman-Specific Agility Needs
Before you buy a single piece of equipment, you need to understand what makes training a Doberman different from training a Border Collie or a Papillon. Your equipment choices, training timeline, and safety protocols must account for your dog’s unique physical and mental characteristics.
Physical Considerations That Matter
Size and Jump Height Requirements
Adult Dobermans typically stand 24-26 inches at the withers for females and 26-28 inches for males, weighing between 70-100 pounds. This places them in the 24-inch jump height class for AKC competitions (dogs 22+ inches tall) and the 22-inch class for NADAC.
What does this mean for equipment? You need adjustable jumps that can scale from beginner heights (8-12 inches) all the way to competition standard (20-24 inches). That cheap plastic jump set rated for “small to medium dogs”? It won’t cut it. Your equipment must physically accommodate a large, powerful dog moving at speed.
Weight Capacity Is Non-Negotiable
Here’s where many beginners make costly mistakes: they buy equipment designed for 30-50 pound dogs, then watch it buckle or tip when their Doberman hits it at full speed. Pause tables must support 110+ pounds without wobbling. Tunnel bags need serious weight to prevent a 90-pound dog from sliding the tunnel across your yard. Jump bases require wide stances for stability.
Always check weight ratings. If a product doesn’t list one, assume it’s not built for large breeds.
Joint-Friendly Equipment Choices
Dobermans are athletic, but they’re also prone to joint issues—especially hip dysplasia and arthritis as they age. Your equipment setup should minimize joint stress:
- Grass or rubber surfaces (never concrete or hard dirt)
- Low jump heights during training (even if they can easily clear 24 inches)
- Gradual progression (no sudden increases in height or difficulty)
- Quality construction (stable obstacles prevent awkward landings)
Think long-term. The right equipment protects your Doberman’s joints for years of enjoyable training.
Health Considerations BEFORE Starting Agility
This section could save your Doberman’s life. Before you spend a dollar on equipment, schedule these veterinary evaluations:
Cardiac Screening Is Critical
Here’s the sobering reality: approximately 60% of Doberman Pinschers are genetically predisposed to dilated cardiomyopathy (DCM), a fatal heart condition that causes the heart to enlarge and weaken. DCM can strike suddenly, even in dogs that appear healthy.
Before starting any intense physical activity like agility, your Doberman needs:
- Echocardiogram (ultrasound of the heart)
- 24-hour Holter monitor (detects arrhythmias)
- Annual cardiac rechecks (DCM can develop at any age)
Agility is cardiovascular exercise. Your dog’s heart must be healthy enough to handle it. Don’t skip this step.
Growth Plate Closure Timeline
Dobermans are large-breed dogs with extended growth periods. Their growth plates—areas of developing cartilage near the ends of long bones—don’t fully close until 18-24 months of age. Jumping on open growth plates can cause permanent joint damage, arthritis, and orthopedic problems.
Age-appropriate guidelines:
- 6-12 months: Foundation obedience, tunnels, body awareness work (no jumping)
- 12-18 months: Low jumps only (8-12 inches), weave pole introduction (channel method)
- 18+ months: Full-height jumping and all equipment types allowed
Be patient. Waiting those extra months protects your dog’s skeletal development and ensures a longer, healthier agility career.
Hip and Joint Evaluation
Request hip and elbow X-rays around 18-24 months, especially if you plan to compete seriously. While you can’t prevent genetic hip dysplasia, knowing your dog’s baseline joint health helps you adjust training intensity appropriately.
Temperament & Training Needs
The Doberman Agility Advantage
Dobermans bring incredible assets to agility:
- High drive and focus: They live to work with their handler
- Intelligence: They learn obstacle skills quickly
- Athletic ability: Speed, power, and grace in one package
- Handler attachment: Strong bond makes training intuitive
The Sensitivity Factor
But Dobermans also have a sensitive side. Harsh corrections or intimidation during agility training can shut them down completely. Some Dobermans are naturally confident; others need careful confidence-building around new equipment.
Your training approach matters:
- Use positive reinforcement (treats, toys, praise)
- Never force your dog onto equipment
- Keep sessions short and fun (5-10 minutes)
- End every session with success
Managing Excitement and Reactivity
Some Dobermans become overstimulated in training environments—barking at other dogs, losing focus, or becoming too aroused to listen. If your dog shows reactivity, address it BEFORE introducing agility equipment. Work on:
- Calm focus around distractions
- Impulse control exercises
- Settling behaviors
Agility competitions are chaotic, loud environments. Your dog needs emotional regulation skills to succeed.
The Essential Starter Equipment List
Let’s cut to the chase: What do you actually need to START agility training with your Doberman? Not everything—just the essentials that build foundation skills.
The “Must-Have Core 4” Equipment
These four pieces form the backbone of every agility training program. Master these before considering anything else.
1. Jumps (Adjustable Bar Jumps)
Why it’s essential: Jumping is the most common obstacle in agility courses—you’ll encounter 15-20 jumps in a single run. Jumping also teaches your dog spatial awareness, timing, and confidence. Every agility skill builds from proper jumping technique.
What to look for:
- Height adjustable from 4-26 inches
- Displacement bars (bars that fall easily when bumped—safety feature)
- Wide, stable bases (won’t tip when your 80-pound dog brushes past)
- Lightweight enough to move but sturdy enough to stay put
- Weather-resistant materials if training outdoors
How many: Start with 2-4 jumps. Two allows basic sequencing; four lets you create mini-courses.
Recommended starting height: Begin at 8-12 inches regardless of your dog’s size. Low jumps teach proper technique without joint stress. You’ll gradually increase to 20-24 inches as skills develop.
2. Tunnel (Collapsible or Rigid)
Why it’s essential: Tunnels build confidence and are usually the easiest obstacle for dogs to learn. They create drive and enthusiasm for agility. Plus, tunnels appear in virtually every agility course (typically 2-4 per run).
What to look for:
- Diameter: 24 inches minimum for Dobermans (regulation size)
- Length: 15-20 feet (matches competition standards)
- Material: Heavy-duty vinyl or commercial-grade nylon
- Rib construction: 4-inch pitch (spacing) provides structure while remaining flexible
- Weight: Heavier tunnels stay in place; lightweight tunnels slide around
Tunnel types:
- Open tunnel: Most common, fully collapsible for storage
- Chute tunnel: Advanced obstacle (fabric chute attached to rigid opening)—skip this as a beginner
Important for large breeds: Cheap play tunnels designed for toddlers will collapse under a full-speed Doberman. Invest in actual agility tunnels rated for large dogs.
3. Weave Poles (6-12 Poles)
Why it’s essential: Weave poles are the most technically challenging agility obstacle. Dogs must slalom through 6-12 upright poles spaced 24 inches apart. This skill requires daily practice and takes months to master—starting early is crucial.
What to look for:
- Pole count: Start with 6 poles (you can add more later)
- Spacing: 24 inches center-to-center (competition standard)
- Height: 40-48 inches tall
- Base stability: Must withstand a large dog weaving at speed
- Adjustability: Systems that allow “channel” or “2×2” training methods
Training method note: The “2×2 method” (teaching with pairs of poles) is highly effective for Dobermans. Look for weave pole sets with bases that can be positioned independently.
Why 6 poles vs. 12: Beginners should start with 6 poles to teach the basic weaving motion. Once your dog masters 6, you can add 6 more to reach competition standard (12 poles).
4. Pause Table or Platform (Adjustable Height)
Why it’s essential: The pause table teaches impulse control and the ability to settle on command—crucial skills for competition where dogs must stop on the table for 5 seconds. It also gives you a designated “reward station” during training.
What to look for:
- Size: Minimum 36″ x 36″ surface (large breeds need room)
- Height: Adjustable from 8″ to 24″ (24″ is Doberman competition height)
- Surface: Non-slip (rubber, carpet, or textured coating)
- Weight capacity: 110+ pounds minimum
- Stability: Wide legs, no wobbling
Training benefit: The pause table becomes your dog’s “home base” during training—a place to settle, take a breath, and collect rewards between sequences.
The “Nice-to-Have Next 3” Equipment
Once you’ve mastered the Core 4, consider adding these pieces to expand your training:
5. Contact Trainer or Wobble Board
Prepares dogs for contact obstacles (A-frame, dog walk, teeter) by teaching proper foot placement and confidence on moving/elevated surfaces. Cost: $30-$80.
6. Tire Jump or Hoop
A specialty jump where dogs leap through a suspended tire or hoop. Adds variety to courses and teaches precision. Cost: $50-$150.
7. Tunnel Bags or Sandbags
Weighted bags (20-40 pounds each) placed on tunnel openings to prevent sliding. Essential if training on smooth surfaces. Cost: $20-$60.
Equipment Introduction Sequence: When to Buy What
Don’t buy everything at once. Follow this timeline:
Month 0-3: Foundation Work (No Equipment Needed)
- Focus: Basic obedience, recall, focus work, body awareness
- Investment: $0 (use household items like cones, targets)
Month 3-6: The Essential Trio
- Buy: 2-4 jumps + tunnel + pause table
- Investment: $150-$500 depending on quality
- Focus: Jump foundation, tunnel enthusiasm, table behavior
Month 6-12: Adding Challenge
- Buy: 6 weave poles + tire jump + contact trainer
- Investment: $150-$350
- Focus: Weave pole introduction (2×2 or channel method), continued jump/tunnel work
Month 12+: Advanced Equipment
- Consider: Additional jumps (total 6-8), full 12-pole weave set, contact equipment (A-frame, dog walk)
- Investment: $300-$1,500+ for serious competition training
- Focus: Speed, sequencing, handling skills
This progressive approach prevents overwhelm (for both you and your dog) and ensures you’re not spending money on equipment you’re not ready to use.
Budget Breakdown: 3 Investment Tiers
Let’s talk money. Agility equipment ranges from cheap Amazon kits to professional-grade gear costing thousands. Here are three realistic budget tiers based on your goals and commitment level.
Budget Tier 1: “The Essentials” ($150-$300)
Recommended For:
- Absolute beginners testing interest in agility
- Limited space (apartment, small yard)
- Casual fun rather than competition goals
- Tight budget
What You Get: A basic starter kit or budget-friendly individual pieces that teach fundamental skills. These won’t last forever, but they’ll get you started.
Equipment Breakdown:
| Item | Specs | Cost |
|---|---|---|
| 2-4 Budget Jumps | PVC or lightweight plastic, adjustable 8-24″ | $40-$80 |
| Play Tunnel | Collapsible fabric, 15-18 feet, 24″ diameter | $30-$50 |
| 6 Weave Poles | DIY PVC or budget commercial set | $40-$70 |
| Pause Platform | DIY wood platform or basic commercial | $20-$50 |
| Tunnel Bags/Weights | Sandbags or improvised weights | $20-$50 |
| TOTAL | $150-$300 |
Example Product: Amazon 60-Piece Dog Obstacle Course Kit ($100-$150)
This popular all-in-one kit includes jumps, tunnel, weave poles, tire jump, pause box, and storage bag.
Pros:
- Complete starter setup in one purchase
- Affordable entry point
- Lightweight and portable
- Good for testing whether your dog enjoys agility
Cons:
- Lower durability (may last 1-2 years with large breed use)
- Jump bars and weave poles can be flimsy
- Tunnel quality inferior to professional versions
- May need upgrades within 6-12 months if you get serious
Rating: ⭐⭐⭐½ (3.5/5)
Bottom line: This tier is perfect if you’re unsure whether agility will become a long-term hobby. It’s affordable enough that you won’t feel guilty if your dog decides weave poles aren’t their thing.
Budget Tier 2: “The Serious Hobbyist” ($400-$700)
Recommended For:
- Committed to regular training (3-5 times weekly)
- Backyard setup with dedicated space
- Planning to compete eventually
- Want equipment that lasts 3-5+ years
What You Get: Mid-range quality with better durability, proper adjustability, and closer adherence to competition standards. This is the “sweet spot” for most Doberman agility enthusiasts.
Equipment Breakdown:
| Item | Specs | Cost |
|---|---|---|
| 4 Mid-Range Adjustable Jumps | Metal or durable PVC, displacement bars, wide bases | $120-$200 |
| Heavy-Duty Tunnel | Commercial-grade vinyl, 15-20 feet, regulation size | $100-$150 |
| 12 Weave Poles | Adjustable bases, 2×2 training compatible | $150-$250 |
| Adjustable Pause Table | 36″x36″, adjustable 8-24″, non-slip surface | $80-$150 |
| Tire Jump | Regulation hoop with adjustable height | $50-$100 |
| Contact Trainer Board | Wobble board or plank for contact training | $30-$50 |
| TOTAL | $530-$900 |
Recommended Brands:
- Better Sporting Dogs: Mid-range pricing, good durability, popular among home trainers
- Dog Agility Shop: USA-made, solid construction, 3-5 year lifespan
- Affordable Agility: Budget-friendly competition-grade equipment
Pros:
- Proper weight capacity for Dobermans
- Equipment grows with your training (adjustable heights)
- Closer to competition standards
- Better resale value if you decide to upgrade
- Handles weather exposure better
Cons:
- Higher upfront investment
- Requires storage space (garage, shed)
- Heavier equipment (less portable for park training)
Example Setup: Dog Agility Shop “Serious Trainer Bundle” (~$650)
Includes 4 regulation jumps, 15-foot tunnel, 12 adjustable weave poles, pause table, and tire jump. All made in USA with 2-year warranty.
Rating: ⭐⭐⭐⭐½ (4.5/5)
Bottom line: This tier is ideal for Doberman owners who’ve tried agility and love it. The equipment will last through years of training and is competition-ready when you are.
Budget Tier 3: “The Competition-Ready Setup” ($800-$1,500+)
Recommended For:
- Serious competitors training for trials
- Professional trainers or agility instructors
- Multiple dogs sharing equipment
- Want the best durability and performance
What You Get: Professional-grade equipment meeting AKC, NADAC, and USDAA competition standards. Built to withstand daily use and outdoor elements for 5-10+ years.
Equipment Breakdown:
| Item | Specs | Cost |
|---|---|---|
| 6-8 Professional Jumps | Regulation specs, commercial-grade, competition quality | $300-$500 |
| Competition Tunnel | Heavy-duty vinyl, regulation 20 feet, commercial weight | $200-$300 |
| 12 Competition Weave Poles | Professional bases, exact 24″ spacing, rigid construction | $250-$400 |
| Regulation Pause Table | Competition-certified, 36″x36″, professional build | $150-$250 |
| Regulation Tire Jump | Professional hoop, competition-certified | $100-$150 |
| Contact Equipment | A-frame or dog walk (optional advanced purchase) | $500-$1,000+ |
| TOTAL | $1,000-$2,600+ |
Recommended Brands:
- Clean Run: Industry-leading brand, used at major competitions
- Carlson Agility: Premium quality, professional-grade, made in USA
- Max200: Competition-standard equipment, 10+ year lifespan
- J&J Dog Supplies: Professional training equipment, competition-certified
Pros:
- Built to professional competition specifications
- Maximum durability (5-10+ years or more)
- Proper weight distribution for high-speed large dogs
- Best resale value
- Often comes with warranties and customer support
- Used at actual agility trials
Cons:
- Significant financial investment
- Heavy (difficult to transport)
- Requires substantial storage space
- May be overkill for casual training
Example Setup: Clean Run “Competition Bundle” (~$1,200)
Includes 6 regulation jumps, 20-foot competition tunnel, 12 professional weave poles, regulation pause table, and tire jump. All equipment used at AKC/NADAC trials.
Rating: ⭐⭐⭐⭐⭐ (5/5)
Bottom line: This tier is for serious competitors who want to train on the exact equipment they’ll encounter at trials. If agility becomes your lifestyle (not just a hobby), this investment pays for itself in durability and performance.
Cost-Saving Strategies That Actually Work
1. Buy Used Equipment
- Check Facebook Marketplace, Craigslist, and local agility club “for sale” groups
- People upgrading equipment often sell solid mid-range gear for 40-60% off
- Inspect carefully for damage, rust, or wear
2. Start Small, Add Incrementally
- Month 1: Buy jumps only ($80-$150)
- Month 2: Add tunnel ($50-$120)
- Month 3: Add weave poles ($100-$200)
- Spreading purchases over 6 months eases budget strain
3. DIY Select Pieces
- Weave poles: $40-$60 in PVC materials vs. $150-$250 commercial
- Basic jumps: $30-$50 DIY vs. $100-$150 commercial
- Pause platform: $30-$40 DIY vs. $80-$150 commercial
- (More DIY guidance in next section)
4. Join an Agility Club
- Many clubs have equipment to practice on—no purchase needed
- Annual membership: $50-$150 (vs. $500+ buying equipment)
- Bonus: Access to trainers and training space
5. Black Friday and Holiday Sales
- Major agility retailers (Clean Run, Carlson) offer 20-40% off
- Sign up for email lists in October
- Amazon agility kits often discounted 30-50%
6. Bundle Deals vs. Individual Purchases
- Bundles can save 15-25% compared to buying individually
- But only if you need EVERYTHING in the bundle
- Do the math—sometimes individual pieces cost less
Budget Reality Check: Most serious Doberman agility enthusiasts spend $400-$800 in their first year on equipment and training classes. Plan accordingly.
DIY vs. Commercial Equipment: Complete Comparison
Should you build your own agility equipment or buy ready-made? The answer depends on your budget, skills, and safety priorities.
DIY Equipment: Pros & Cons
The Advantages:
Cost Savings (50-70% Less)
- DIY weave poles: $40-$60 vs. $150-$250 commercial
- DIY jumps: $30-$50 each vs. $100-$150 commercial
- DIY pause platform: $30-$40 vs. $80-$150 commercial
Customization Control
- Adjust dimensions to your exact specifications
- Choose colors, materials, portability features
- Modify as your dog’s skills progress
Repair Simplicity
- You built it, you can fix it
- Replacement parts readily available at hardware stores
- No waiting for manufacturer support
The Disadvantages:
Time Investment
- Each piece requires 2-6 hours of building time
- Learning curve if you’re not handy with tools
- Trial and error to get designs right
Tool Requirements
- PVC cutter ($15-$30)
- Drill with bits ($40-$100)
- Measuring tape, level, saw (if using wood)
- Not everyone has access to these tools
May Not Meet Competition Standards
- Homemade equipment might not match exact specifications
- Some trials require certified equipment
- Judges may penalize non-standard obstacles
Safety Concerns
- Improper construction can injure dogs
- Sharp edges, unstable bases, improper materials
- No liability protection or warranties
Commercial Equipment: Pros & Cons
The Advantages:
Professional Quality
- Designed by agility experts
- Tested for safety and durability
- Meets competition standards
Ready to Use
- Unbox, assemble (if needed), start training
- No building learning curve
- Consistent quality
Warranty and Support
- Many brands offer 1-3 year warranties
- Customer service for questions or issues
- Replacement parts available
Resale Value
- Quality commercial equipment retains 50-70% of value
- Easy to sell when upgrading
- Recognized brands sell faster
The Disadvantages:
Higher Upfront Cost
- 2-3x more expensive than DIY equivalent
- Shipping fees can add $50-$150
- No cost-control once you order
Limited Customization
- You get what they offer
- Can’t adjust dimensions easily
- Color/style options limited
Dependency on Manufacturer
- Replacement parts must come from them
- If company goes out of business, you’re stuck
- Repairs more complicated
Best DIY Projects for Beginners
If you want to try DIY, start with these three beginner-friendly projects:
1. PVC Weave Poles ($40-$60)
Materials Needed:
- (12) 1-inch diameter, 48-inch PVC pipes (poles)
- (12) 1-inch PVC floor flanges (bases)
- (12) Wood or plastic base plates (12″x12″ each)
- PVC primer and cement
- Screws
- Spray paint (optional)
Instructions:
- Screw floor flanges to center of base plates
- Cut PVC pipes to 40-48 inches
- Prime and cement one end of each pipe into floor flanges
- Let cure 24 hours
- Space 24 inches apart (center-to-center) when setting up
Difficulty: Easy
Time: 2-3 hours
Cost Savings: $110-$190 vs. commercial sets
2. PVC Bar Jumps ($30-$50 per jump)
Materials Needed (per jump):
- (4) 1-inch PVC pipes, 36 inches long (uprights)
- (2) 1-inch PVC T-connectors
- (2) 5-foot pieces of 1-inch PVC (base feet)
- (1) 4-5 foot jump bar (1-inch PVC, painted)
- (2) PVC jump cups (purchase commercial for $10-$15/pair)
- PVC cement
Instructions:
- Connect T-connectors to create base (5-foot span)
- Attach 36-inch uprights vertically
- Install jump cups on uprights (multiple heights)
- Cut and paint jump bar
- Weight bases with sand (optional)
Difficulty: Easy-Moderate
Time: 1-2 hours per jump
Cost Savings: $70-$100 per jump vs. commercial
3. Wooden Pause Platform ($30-$40)
Materials Needed:
- (1) 36″x36″ sheet of 3/4″ plywood
- (4) 8-inch or 12-inch wooden blocks (legs)
- Wood screws
- Sandpaper
- Outdoor carpet or rubber mat (non-slip surface)
- Weather-resistant paint or sealant
Instructions:
- Sand plywood edges smooth (no splinters)
- Attach legs at corners (adjustable height with multiple leg sizes)
- Paint or seal wood for weather protection
- Attach non-slip surface to top
- Test stability before use
Difficulty: Easy
Time: 2-3 hours
Cost Savings: $40-$110 vs. commercial tables
What NOT to DIY (Safety First)
Never DIY these obstacles due to safety risks:
❌ Contact Equipment (A-Frame, Dog Walk, Teeter)
- Engineering precision required for stability
- Improper angles can cause falls or injury
- Liability concerns if dog is injured
- Commercial versions have safety certifications
❌ Competition-Grade Tunnels
- Specific material requirements for durability
- Proper rib spacing and construction
- Cheap materials can collapse on dogs
❌ Tire Jump Frames
- Requires precise engineering for stability
- Tire must break away under pressure (safety feature)
- Commercial versions have tested break-away mechanisms
Safety rule: If an obstacle involves height, speed, or moving parts, buy commercial. Your dog’s safety is worth the investment.
The Hybrid Approach (Recommended)
Smart agility trainers use a hybrid strategy:
DIY These:
- Weave poles (straightforward construction, significant savings)
- Practice jumps (for home training, not competition)
- Pause platforms (simple design, easy to build safely)
Buy Commercial:
- Tunnel (quality and durability matter)
- Competition/regulation jumps (if planning to trial)
- Tire jump (safety and engineering complexity)
- Any contact equipment (safety critical)
This approach saves $200-$400 while ensuring safety on complex obstacles.
Equipment Specifications & Safety Standards
Understanding competition standards helps you buy the right equipment, even if you never plan to compete. These specifications ensure equipment is safe, effective, and appropriate for your Doberman.
Understanding Agility Organizations
Four major organizations govern dog agility in North America, each with slightly different rules and equipment specifications:
AKC (American Kennel Club)
- Most popular in the USA
- Requires breed registration (purebreds) or Canine Partners number (mixed breeds)
- Height divisions: 8″, 12″, 16″, 20″, 24″
NADAC (North American Dog Agility Council)
- Emphasizes handler-dog teamwork and flow
- More forgiving courses (wider spacing)
- Height divisions: 8″, 12″, 16″, 20″
USDAA (United States Dog Agility Association)
- Advanced-level competition focus
- More challenging courses
- Height divisions: 12″, 16″, 22″, 26″
CPE (Canine Performance Events)
- Beginner-friendly
- Focuses on fun and inclusion
- Height divisions: 4″, 8″, 12″, 16″, 20″, 24″
For Doberman owners: Most Dobermans compete in the 24″ (AKC/CPE), 22″ (USDAA), or 20″ (NADAC) divisions based on their height at the withers.
Jump Specifications
Jumps are the foundation of agility. Here’s what you need to know:
Height Requirements:
- Range: 4″ to 26″ adjustable in 2-4 inch increments
- Doberman competition height: 20-24″ (depending on organization)
- Training height: Start at 8-12″, gradually increase
Bar Specifications:
- Length: 4-5 feet wide
- Diameter: 1 inch (Schedule 40 PVC standard)
- Material: PVC pipe, lightweight wood, or specialized jump bars
- Color: High-contrast colors (often striped) for visibility
Uprights:
- Height: Minimum 32 inches tall
- Width: 1-4 inches wide
- Construction: PVC, wood, or metal
Displacement Cups (Critical Safety Feature):
- Jump bars must rest in shallow cups, not attached
- Bars fall when bumped (prevents injury)
- Dogs aren’t penalized for dislodged bars (only when they knock bars but continue)
Base/Wing Specifications:
- Stance width: Minimum 36-48 inches for stability
- Weight: Stable enough to resist tipping during training
- Wings (optional): Help guide dogs through center of jump
Doberman-Specific Considerations:
- Wide bases (48″+ stance) prevent tipping when your 90-pound dog cuts close
- Heavy-duty construction for repeated large-breed impacts
- Easy height adjustment for progressive training
Tunnel Specifications
Open Tunnel:
- Length: 15-20 feet (regulation)
- Diameter: 24 inches (±2 inches)
- Material: Heavy-duty vinyl or commercial-grade nylon
- Rib Construction: 4-inch pitch (spacing between support ribs)
- Color: Solid or striped (must be clearly visible)
- Openings: Circular with reinforced edges
Doberman-Specific Considerations:
- 24-inch diameter is non-negotiable (smaller tunnels uncomfortable for large breeds)
- Heavy-duty construction (lightweight play tunnels collapse under speed and weight)
- Tunnel bags required: 20-40 lb sandbags on openings prevent sliding
Collapsed/Chute Tunnel:
- Advanced obstacle (not for beginners)
- 3-foot rigid opening with 8-12 foot fabric chute
- Many organizations phasing this out due to safety concerns
Weave Pole Specifications
Weave poles are the most technically precise obstacle:
Pole Specifications:
- Count: 6 poles (training) or 12 poles (competition standard)
- Height: 40-48 inches tall
- Diameter: 3/4″-1″ (must be rigid, not flexible)
- Spacing: 24 inches center-to-center (exact measurement required)
- Material: Metal, thick PVC, or fiberglass
- Base: Must be stable enough to prevent tipping during weaving
Training Variations:
- Channel weaves: Poles split into two offset rows (gradually close together)
- 2×2 method: Poles in pairs, gradually chained together
- Adjustable bases: Allow spacing changes for training methods
Doberman-Specific Considerations:
- Sturdy bases essential (large dogs create significant lateral force)
- Proper 24-inch spacing (too narrow causes frustration, too wide teaches incorrect technique)
- Height matters: 40-48 inches ensures proper head-down weaving posture
Pause Table Specifications
AKC/USDAA Standards:
- Surface: 36″ x 36″ minimum (larger breeds need room)
- Height options: 8″, 16″, 24″ (adjustable or fixed)
- Surface texture: Non-slip (rubber, carpet, or textured coating)
- Construction: Stable, no wobbling or tipping
- Weight capacity: Minimum 110 pounds for large breeds
NADAC Standards:
- NADAC uses platforms instead of tables (lower to ground)
- 24″ x 36″ surface area
- 12″ maximum height
Doberman Competition Height:
- 24 inches (AKC, USDAA, CPE for dogs over 22″ at withers)
Doberman-Specific Considerations:
- 36″x36″ minimum (smaller tables are cramped for 70-100 lb dogs)
- Heavy-duty construction (flimsy tables tip or collapse)
- Non-slip surface critical (prevents slipping during down position)
Weight Capacity & Durability for Large Breeds
This is where many budget equipment options fail Dobermans:
Minimum Weight Ratings:
- Pause Table: 110+ lbs (test by standing on it yourself before using)
- Contact Equipment (A-frame/Dog Walk): 100+ lbs
- Jump Bases: Must withstand 90 lb dog impact without tipping
Durability Factors:
- Metal bases: Most durable, rust-resistant coating needed
- Thick PVC (Schedule 40): Good for jumps and weave poles
- Wood: Acceptable if sealed/painted for weather resistance
- Thin plastic: Avoid—breaks quickly with large breed use
Equipment Anchoring Options:
- Ground stakes for outdoor setups
- Weighted bases (sandbags)
- Interlocking pieces for stability
Reality check: If equipment description says “suitable for small to medium dogs,” it’s NOT suitable for your Doberman.
Safety Features to Look For
Before buying any equipment, check for these safety features:
✅ Rounded edges (no sharp corners that could cut paws or skin)
✅ Non-slip surfaces on tables, platforms, and contact equipment
✅ Breakaway/displacement bars (jump bars that fall, not fixed in place)
✅ Weather-resistant materials (no rust, splinters, or UV degradation)
✅ Stable bases (wide stance, not easily tipped)
✅ Proper weight ratings clearly stated
✅ Warranty or satisfaction guarantee (shows manufacturer confidence)
Red flags to avoid: ❌ No weight capacity listed
❌ Reviews mentioning tipping or instability
❌ Sharp metal edges or exposed screws
❌ Flimsy construction or thin materials
❌ “Suitable for all dogs” without size specifications
Your Doberman’s safety depends on quality equipment. Don’t compromise here.
Specific Product Recommendations & Reviews
Now for the part you’ve been waiting for: specific products I recommend, with honest pros and cons.
Best Budget Starter Kits ($100-$200)
Product 1: Amazon 60-Piece Dog Obstacle Course Kit
Price: $100-$150
What’s Included: 4 hurdles, 18-foot tunnel, 12 weave poles, jump ring, pause box, toy balls, storage bag
Pros:
- Complete starter kit in one purchase
- Includes storage bag for portability
- Affordable entry point for testing interest
- Lightweight (easy to move and store)
- Setup takes under 30 minutes
Cons:
- Lower durability (expect 1-2 years with regular large-breed use)
- Jump bars can bend or break with heavy impacts
- Weave pole bases not sturdy enough for fast, powerful dogs
- Tunnel lighter-weight than competition versions
- May need replacements/upgrades within a year
Best For: Absolute beginners unsure if agility will stick, families with limited space, casual weekend training
Rating: ⭐⭐⭐½ (3.5/5)
Bottom Line: Solid “starter-starter” kit that lets you test agility without serious financial commitment. But if your Doberman falls in love with agility, plan to upgrade within 12-18 months.
Product 2: Affordable Agility “In the Bag” Kit
Price: $150-$180
What’s Included: Bar jump, 6 weave poles, tire jump, 15-foot tunnel, pause box
Pros:
- Better quality than generic Amazon kits
- Made by actual agility company (not random manufacturer)
- Comes in portable storage bag
- All essentials in one purchase
- Good customer support
Cons:
- Still budget-tier materials (not competition-grade)
- Limited adjustability compared to mid-range options
- Only includes one jump (you’ll want more eventually)
- Weave pole bases adequate but not heavy-duty
Best For: Budget-conscious beginners who want slightly better quality than Amazon, people with small training spaces, those prioritizing portability
Rating: ⭐⭐⭐⭐ (4/5)
Bottom Line: Best value in the budget category. Small step up in quality makes a noticeable difference in durability and training experience.
Best Mid-Range Equipment ($300-$700)
Jumps: Better Sporting Dogs Adjustable Jumps
Price: $30-$50 per jump
Specs: Adjustable 8″-26″, lightweight aluminum, includes displacement bars, 48″ wing span
Pros:
- Perfect for home practice
- True adjustability across full height range
- Sturdy enough for Doberman-speed impacts
- Weather-resistant aluminum construction
- Easy to move and store
- Good resale value
Cons:
- Not quite competition-grade (but very close)
- Bases could be slightly wider for extra stability
- Some assembly required
Best For: Serious home trainers, those preparing for eventual competition, backyard agility courses
Rating: ⭐⭐⭐⭐½ (4.5/5)
Recommendation: Buy 4 jumps for $120-$200 total. This gives you enough to create mini-sequences and practice handling.
Tunnel: Clean Run Open Tunnel (15 feet)
Price: $120-$150
Specs: 24″ diameter, heavy-duty vinyl, regulation size, 4-inch rib spacing, reinforced openings
Pros:
- Professional-quality construction
- Used at actual AKC/NADAC competitions
- Extremely durable (5-10+ year lifespan)
- Proper weight for stability
- Easy to clean
- Fully collapsible for storage
- Brand trusted by professional trainers
Cons:
- Higher price than budget tunnels
- Heavier (less portable, but more stable)
- Overkill if you’re only doing casual training
Best For: Anyone serious about agility training or competition
Rating: ⭐⭐⭐⭐⭐ (5/5)
Bottom Line: This is where I recommend spending money. A quality tunnel makes training safer and more enjoyable. Your Doberman will use this obstacle constantly—buy once, buy right.
Weave Poles: Dog Agility Shop Channel Weave Set (12 poles)
Price: $180-$250
Specs: 12 poles, adjustable spacing for channel or 2×2 training, durable bases, 48″ height, metal construction
Pros:
- Made in USA
- Supports multiple training methods (channel, 2×2, straight)
- Adjustable spacing (gradually narrow as dog learns)
- Sturdy bases withstand large dog impacts
- Proper 24-inch competition spacing
- 2-3 year warranty
Cons:
- Higher investment than DIY or budget poles
- Takes up more storage space than collapsible options
- Setup time (5-10 minutes to position all 12 poles)
Best For: Committed trainers planning to compete, anyone teaching weave poles properly from the start
Rating: ⭐⭐⭐⭐⭐ (5/5)
Alternative: Start with a 6-pole set ($100-$130) and add 6 more later if budget is tight.
Best Professional/Competition Equipment ($800-$1,500+)
Complete Setup: Clean Run “Competition Bundle”
Price: $1,000-$1,500
What’s Included: 6 regulation jumps, 20-foot competition tunnel, 12 professional weave poles, tire jump, regulation pause table
Pros:
- Exact equipment used at AKC/USDAA trials
- Train on competition-standard obstacles
- Maximum durability (10+ year lifespan)
- Proper weight capacity for repeated large-breed use
- Best resale value
- Professional warranties and customer support
- Pride of ownership (you’re training on the real deal)
Cons:
- Substantial financial commitment
- Heavy equipment (difficult to transport)
- Requires dedicated storage space
- May be unnecessary if only training for fun (not competition)
Best For: Serious competitors training for trials, professional agility trainers, people with multiple agility dogs
Rating: ⭐⭐⭐⭐⭐ (5/5)
Bottom Line: If agility becomes your lifestyle, this is the equipment you’ll eventually own. Buying it upfront saves money compared to upgrading piece-by-piece.
Brand Comparison Chart
| Brand | Price Range | Quality | Durability | Warranty | Best For |
|---|---|---|---|---|---|
| Amazon Generics | $ | Budget | 1-2 years | Limited/None | Testing interest |
| Affordable Agility | −$ | Good | 2-3 years | 1 year | Budget-conscious beginners |
| Better Sporting Dogs | $$ | Very Good | 3-5 years | 1-2 years | Home trainers |
| Dog Agility Shop | $$ | Very Good | 3-5 years | 2-3 years | Serious hobbyists |
| Clean Run | −$ | Excellent | 5-10+ years | 2-5 years | Competitors |
| Carlson Agility | −$ | Excellent | 5-10+ years | 3-5 years | Competitors/Professionals |
| Max200 | $ | Premium | 10+ years | 5 years | Professional/Commercial |
My Hybrid Setup Recommendation (Total: $450-$650):
- 4 Better Sporting Dogs jumps: $150-$200
- Clean Run tunnel: $120-$150
- DIY weave poles (12): $50-$80
- Better Sporting Dogs pause table: $80-$120
- DIY or budget tire jump: $50-$100
This setup gets you professional-quality where it matters most (tunnel, jumps, table) while saving money on DIY weaves until you’re sure you want to invest more.
Space Requirements & Setup Solutions
“I don’t have room for agility equipment” is the second most common objection I hear (right after “It’s too expensive”). Let’s solve the space problem.
Space Calculations: How Much Do You Really Need?
Minimum Starter Setup: 20 feet x 30 feet (600 square feet)
- Allows rotation of 2-3 obstacles at a time
- Adequate for foundation training on jumps, tunnel, weaves
- Can fit in many suburban backyards or open park spaces
Ideal Backyard Setup: 30 feet x 50 feet (1,500 square feet)
- Room for mini-course with 4-6 obstacles
- Comfortable handler movement space
- Allows basic sequencing practice
- This is the “sweet spot” for home training
Full Practice Course: 70 feet x 100 feet (5,000+ square feet)
- Approximates competition ring size
- Can set full courses with 12-15 obstacles
- Requires large yard or rented facility
- Probably overkill for home training
Reality check: Most successful agility dogs train in spaces far smaller than competition rings. You don’t need acres—you need smart setup rotation.
Backyard Setup Layouts
Small Yard (600-1,000 sq ft) Strategy:
Instead of setting up everything simultaneously, rotate 2-3 obstacles per session:
- Monday/Wednesday: 2 jumps + tunnel (sequencing practice)
- Tuesday/Thursday: Weave poles + pause table (technical skills)
- Friday/Weekend: Jumps + weaves + tunnel (combining skills)
Storage: Keep equipment in garage/shed, bring out only what you need
Medium Yard (1,000-2,500 sq ft) Strategy:
Set up a permanent or semi-permanent mini-course with 4-6 obstacles:
- 3-4 jumps (creates simple sequences)
- 1 tunnel
- 6-12 weave poles
- 1 pause table or platform
Layout tip: Position equipment in roughly circular or figure-8 pattern so you can run mini-courses with direction changes
Large Yard (2,500+ sq ft) Strategy:
You have room for near-competition layouts! Set up 6-10 obstacles with proper spacing and multiple handling options. Reconfigure weekly to practice different course patterns.
Apartment/No Yard Solutions
No backyard? No problem. Thousands of successful agility dogs train without private outdoor space.
Indoor Training Options:
What you CAN train indoors:
- Low jumps (8-12 inches, using foam jump bars or pool noodles—safer for indoor accidents)
- Target training (foundation for all obstacle skills)
- Weave pole entries (with 3-4 poles in hallway or living room)
- Pause table work (platform settling and position training)
- Rear-end awareness (using balance discs, phone books, or low platforms)
- Focus and impulse control (critical foundation skills)
What you CANNOT train indoors:
- Full-speed sequences (slip/crash hazards)
- Tunnels (unless you have a large basement or garage)
- Full-height jumping (ceiling clearance, flooring impact)
Consider:
- Collapsible/portable equipment: Lightweight jumps and tunnels that fit in car trunk
- Community spaces: Parks, schoolyards during off-hours (check local regulations)
- Agility facility rentals: $15-$30/hour for ring access (much cheaper than buying all equipment)
- Agility club membership: $50-$150/year with regular training access
Portable Park Setup:
Best equipment for taking to parks:
- 2-4 lightweight jumps (Better Sporting Dogs or similar)
- Collapsible tunnel
- Portable weave poles (some bases stake into ground)
- Foldable pause platform
Total weight: 40-60 lbs (fits in large SUV or minivan)
Storage Solutions
Equipment storage doesn’t have to be complicated:
Garage/Shed Organization:
- Wall-mounted hooks for jump bars (keeps off floor)
- Tunnel hung on wall or stored in large bin
- Weave poles bundled together with bungee cord
- Pause table legs removed for flat storage
Outdoor Storage:
- Weatherproof covers for equipment left outside
- Elevated storage (off ground to prevent moisture damage)
- Anchor heavy items (wind can scatter equipment)
Collapsible Options:
- Invest in equipment that collapses or disassembles easily
- Takes 5-10 minutes to set up/break down
- Worth the convenience if storage space is limited
Surface Considerations
Where you train matters as much as what you train with:
Best Surfaces:
- Grass: Ideal for joint health, provides natural traction
- Dirt/mulch: Acceptable, good drainage, softer than hard surfaces
- Rubber mats/tiles: Excellent for indoor training or garage setups
- Artificial turf: Good alternative to grass, consistent footing
Surfaces to AVOID:
- Concrete/pavement: NEVER train agility on hard surfaces (joint damage, paw pad injury, slip risk)
- Slick indoor floors: Hardwood, tile, linoleum without mats (ACL tear risk)
- Rocky/uneven terrain: Trip hazards, paw injuries
Doberman-specific note: Large, fast dogs like Dobermans generate serious impact force. Proper footing isn’t optional—it’s essential for injury prevention.
Safety Protocols & Injury Prevention for Dobermans
This section might save your dog’s life or prevent a career-ending injury. Take it seriously.
Pre-Training Health Checklist
Before your Doberman touches a single piece of agility equipment, complete this health screening:
✅ Cardiac Evaluation (CRITICAL for Dobermans)
- Echocardiogram (heart ultrasound)
- 24-hour Holter monitor (detects arrhythmias)
- Veterinary clearance for intense exercise
- Annual rechecks (DCM can develop at any age)
✅ Orthopedic Evaluation
- Hip and elbow X-rays (screen for dysplasia)
- Physical exam for joint health
- Confirmation that growth plates are closed (18+ months)
✅ General Health
- Current on all vaccinations (you’ll be training around other dogs)
- Parasite prevention up to date
- Healthy weight (obesity increases injury risk)
- Vision and hearing check (important for reading cues)
✅ Fitness Baseline
- Ability to walk briskly 20-30 minutes without fatigue
- No limping or mobility issues
- Healthy cardiovascular endurance
Reality check: Skipping health screening is Russian roulette with your dog’s health. DCM kills Dobermans. Don’t risk it.
Age-Appropriate Equipment Introduction
Doberman growth and development dictates what equipment is safe at each age:
6-12 Months (Puppy Stage):
SAFE:
- Foundation obedience (sit, down, stay, come)
- Tunnel work (low-impact confidence builder)
- Body awareness exercises (backing up, paw targets)
- Focus and impulse control games
- Walking over low objects (ground poles, phone books)
NOT SAFE:
- Jumping (growth plates still open—risk of permanent damage)
- Weave poles at speed (torque on developing joints)
- Repetitive impact exercises
Training focus: Build enthusiastic relationship with agility, teach foundation behaviors
12-18 Months (Adolescent Stage):
SAFE:
- Low jumps ONLY (8-12 inches) even though they can physically jump higher
- Continued tunnel work (can increase speed)
- Weave pole introduction using channel or 2×2 method (LOW SPEED)
- Pause table work (jumping on/off at low heights)
- Introduction to contact trainer or wobble board
NOT SAFE:
- Full-height jumping (growth plates still closing)
- High-speed weaving (lateral torque on spine and hips)
- Contact obstacles at steep angles
Training focus: Technical skills at controlled speed, continued foundation
18+ Months (Adult Stage):
SAFE:
- Full-height jumping (gradually increase to 20-24 inches)
- All equipment types introduced progressively
- Increased speed and difficulty
- Competition training
Training focus: Speed, accuracy, sequencing, competition preparation
Key principle: Just because your 10-month-old Doberman CAN physically jump 24 inches doesn’t mean they SHOULD. Patience now prevents arthritis at age 6.
Proper Warm-Up Routine (10-15 Minutes)
Never start agility training cold. Every session needs a warm-up:
1. Gentle Walk (5 minutes)
- Gradually increase heart rate
- Loosen muscles and joints
- Mental transition into training mode
2. Dynamic Stretches (3-4 minutes)
- Play bows (stretch front legs, back, shoulders)
- Rear leg lifts (ask dog to “shake” each rear leg)
- Gentle side-to-side movements (follow treat to each side)
- Sit-to-stand transitions (without jumping)
3. Low-Impact Warm-Up Exercises (3-4 minutes)
- Hand touches (nose targeting)
- Simple recalls (5-10 feet)
- Walking over low ground poles
- 2-3 passes through tunnel at trot (not full speed)
4. Progressive Jump Warm-Up (2-3 minutes)
- Start with bar on ground or 4 inches
- Gradually raise to training height over 3-5 passes
- Only THEN begin full training session
Total time: 10-15 minutes (seems long, but prevents injury worth thousands in vet bills)
Cool-Down Routine (10 Minutes)
Equally important as warm-up:
1. Slow Walk (5-7 minutes)
- Allows heart rate to return to normal gradually
- Prevents lactic acid buildup in muscles
- Mental wind-down from excitement
2. Static Stretches (2-3 minutes)
- Gentle extension of front legs (hold paw, gently extend forward)
- Hip and rear leg stretches (gently extend rear legs backward)
- Side stretches (lure head to each side with treat)
3. Massage (2-3 minutes)
- Focus on shoulders, hips, back muscles
- Gentle circular motions
- Helps identify any soreness or tension
4. Fresh Water
- Always available after training
- Prevents dehydration
Conditioning Exercises for Injury Prevention
Agility-specific conditioning builds the strength and flexibility dogs need to stay injury-free:
Core Strength:
- Balance disc work (sit, stand, weight shifts)
- Sit-to-stand repetitions on slight incline
- Cavaletti pole walking (lifts legs, engages core)
Rear Leg Strength:
- Hill walking or stair climbing (backwards especially)
- Sit-to-stand from standing on rear legs only
- Controlled trotting on incline
Flexibility:
- Daily stretching routine (described above)
- Varied terrain walking
- Swimming (exceptional full-body conditioning with zero impact)
Cardiovascular Endurance:
- Hiking (builds stamina without repetitive impact)
- Swimming (20-30 minutes, 2-3x weekly)
- Bike joring or trotting (controlled pace)
Schedule: 3-4 days/week of 15-20 minute conditioning sessions separate from agility training
Joint Support Supplements
Many agility competitors supplement their dogs’ diets to support joint health:
Common Supplements:
- Glucosamine & Chondroitin: Support cartilage health
- Omega-3 fatty acids (fish oil): Anti-inflammatory properties
- Green-lipped mussel extract: Natural joint support
- Collagen peptides: Support connective tissue
- MSM: May reduce inflammation
Important: Consult your veterinarian before starting supplements. Quality matters—cheap supplements often contain insufficient active ingredients.
Warning Signs to STOP Training Immediately
Learn to recognize when your Doberman needs a break:
⚠️ Limping or favoring a leg (even subtle)
⚠️ Reluctance to jump or complete obstacles (behavior change)
⚠️ Excessive panting beyond normal exertion
⚠️ Loss of enthusiasm (“shutting down”)
⚠️ Yelping or crying (pain vocalization)
⚠️ Stiffness after training (shouldn’t last more than 1-2 hours)
⚠️ Swelling in joints or paws
⚠️ Changes in gait or movement
When you see these signs: Stop training, assess, and consult your veterinarian if symptoms persist.
Common Injuries & Prevention
Shoulder Strains:
- Cause: Landing from jumps, sharp turns
- Prevention: Proper warm-up, gradual speed increases, core conditioning
Toe/Nail Injuries:
- Cause: Snagging on equipment, overgrown nails
- Prevention: Keep nails trimmed short, inspect equipment for sharp edges
Back/Spine Issues:
- Cause: Twisting at speed, improper weave technique
- Prevention: Core conditioning, proper weave training, avoid tight turns at high speed
ACL/Cruciate Tears:
- Cause: Sudden stops, sharp turns on slick surfaces
- Prevention: Proper footing, conditioning, avoid training on slippery surfaces
Heat Exhaustion (CRITICAL for Dobermans):
- Cause: Training in hot weather, insufficient breaks
- Prevention: Train early morning/evening, provide water breaks every 5-10 minutes, recognize signs (heavy panting, drooling, weakness)
Remember: Prevention is 100x easier and cheaper than treating injuries.
Training Tips & Common Mistakes to Avoid
Let’s save you time, money, and frustration by learning from others’ mistakes.
Foundation Skills BEFORE Equipment
The biggest mistake beginners make? Buying equipment before their dog is ready to use it.
Essential Skills to Master First:
✅ Solid Recall
- Your dog comes every time when called, off-leash, around distractions
- Non-negotiable for safety
✅ Focus and Attention
- Dog checks in with you regularly
- Works around other dogs without fixating or reacting
✅ Basic Obedience
- Sit, down, stay (at distance and with duration)
- These become parts of agility sequences
✅ Body Awareness
- Dog knows where their rear end is (backing up, sidepassing)
- Prevents knocked bars and poor obstacle performance
✅ Impulse Control
- Waits at start line without breaking
- Settles on pause table without constant reminders
Training timeline: Spend 2-4 weeks on foundation skills before introducing equipment. This groundwork pays off exponentially.
Equipment Introduction Best Practices
When you DO start introducing equipment:
Start Low and Slow
- Begin ALL obstacles at the easiest level
- Jump bars on ground or 4 inches
- Weave poles in wide channel
- Tunnel flat and straight (not curved)
Make It FUN
- Lots of praise, high-value treats, favorite toys
- Never drill endlessly
- If dog seems stressed, make it easier
Short Sessions
- 5-10 minutes, 2-3 times daily
- Better than one 30-minute session (dogs learn during rest periods)
Build Confidence
- Never force or intimidate
- Let dog approach obstacles at their pace
- Some dogs need weeks to gain confidence—that’s normal
One New Thing at a Time
- Don’t introduce jumps AND weaves AND tunnels in the same week
- Master one skill before adding complexity
Common Beginner Mistakes
Mistake #1: Jumping Too High Too Soon
❌ The Problem: “My Doberman can easily clear 24 inches, so I’ll train at that height.”
Why it’s wrong: High jumps increase injury risk, teach sloppy technique, and stress developing joints.
✅ The Fix: Start at 8-12 inches regardless of dog’s size. Focus on proper jump arc, approach, and landing. Gradually increase height as technique improves.
Mistake #2: Training When Dog Is Overstimulated
❌ The Problem: Taking reactive or aroused dog directly to agility equipment.
Why it’s wrong: Overstimulated dogs can’t learn, make mistakes, and reinforce bad habits (barking, lunging, out-of-control behavior).
✅ The Fix: Practice focus exercises first. Dog must demonstrate calm attention before starting agility. If they can’t, work on calmness instead—agility will wait.
Mistake #3: Buying Too Much Equipment at Once
❌ The Problem: “I’ll buy a full course so we have everything!”
Why it’s wrong: Overwhelming, expensive, and you’ll use only 2-3 pieces in the first 6 months.
✅ The Fix: Start with jumps + tunnel OR jumps + weaves. Master those completely (3-6 months) before adding more.
Mistake #4: Inconsistent Handling Cues
❌ The Problem: Using different body language, verbal cues, or hand signals each time.
Why it’s wrong: Dogs rely on consistency. Mixed signals create confusion and slow learning.
✅ The Fix: Take a beginner agility class to learn proper handling foundation. Film yourself training to spot inconsistencies.
Mistake #5: Training on Unsafe Surfaces
❌ The Problem: Setting up equipment on concrete, pavement, or slick floors.
Why it’s wrong: Hard surfaces cause joint damage; slippery surfaces cause ACL tears.
✅ The Fix: Invest in proper footing. Grass, dirt, rubber mats, or artificial turf only.
Mistake #6: Skipping Warm-Up and Cool-Down
❌ The Problem: “We’re only training 10 minutes, we don’t need warm-up.”
Why it’s wrong: Cold muscles and ligaments tear easily. Most injuries happen in first 5 minutes.
✅ The Fix: Make 10-minute warm-up non-negotiable. Every. Single. Session.
When to Seek Professional Help
You need a trainer or class when:
- Dog shows fear or stress around equipment (trainer can help build confidence safely)
- You don’t understand sequencing or handling (classes teach these skills)
- Training has stalled (trainer identifies what you’re missing)
- Preparing for first competition (competition training has specific requirements)
- Dog is reactive or overstimulated (needs behavior work before continuing)
What to look for in an agility class:
- Positive reinforcement based (no corrections or intimidation)
- Small class size (4-6 dogs maximum for beginner classes)
- Focus on foundation skills (not rushing to advanced obstacles)
- Safety emphasis (proper warm-up, appropriate equipment)
- Instructor certifications (NADAC, AKC, USDAA judge or certified instructor)
Cost: $100-$200 for 6-8 week beginner course (worth every penny)
Frequently Asked Questions
Q1: How much does it cost to start agility with my Doberman?
A: Budget $150-$300 for basic starter equipment (Amazon kits or DIY), $400-$700 for quality mid-range equipment (Better Sporting Dogs, Dog Agility Shop), or $800-$1,500+ for competition-ready professional gear (Clean Run, Carlson). Add $100-$200 for beginner training classes, which I strongly recommend.
The “sweet spot” for most Doberman owners is $400-$600: quality jumps, professional tunnel, DIY or mid-range weave poles, and a decent pause table.
Q2: What’s the #1 piece of equipment I should buy first?
A: An adjustable jump set (2-4 jumps). Jumping is the foundation of agility—it teaches timing, spatial awareness, and drive. Adjustable jumps grow with your training from 8 inches to competition height.
If budget forces you to choose only one piece initially, choose jumps. You can improvise tunnels and weave poles temporarily, but jumps are hard to substitute properly.
Q3: Can I start agility training before my Doberman is 18 months old?
A: Yes, but with strict restrictions. Before 18 months, focus on:
- Foundation obedience and focus work (any age)
- Tunnel work (low-impact, safe at 6+ months)
- Body awareness exercises (safe at any age)
- Low jumps ONLY 8-12 inches (after 12 months)
NO full-height jumping (20-24 inches) until growth plates close at 18+ months. Patience prevents permanent joint damage and arthritis.
Q4: Is DIY equipment safe for my Doberman?
A: DIY jumps and weave poles CAN be safe if:
- You follow proper specifications (see earlier section)
- You use quality materials (Schedule 40 PVC, proper wood)
- You build stable bases (proper weight distribution)
- You test before using (ensure stability)
NEVER DIY contact equipment (A-frame, dog walk, teeter), competition-grade tunnels, or tire jump frames—the engineering precision and safety testing required make these dangerous to homebuild.
My recommendation: DIY weave poles and practice jumps; buy commercial tunnel and any elevated/moving equipment.
Q5: What’s better: buying a kit or individual pieces?
A: It depends on your commitment level:
Buy a kit if:
- You’re testing interest without major commitment
- Budget is tight ($100-$200)
- You want everything delivered together
- You have limited space (kits often include storage bags)
Buy individual pieces if:
- You’re serious about quality and longevity
- You want to customize your setup
- You’re planning to compete eventually
- You want to spread purchases over time (buy jumps this month, tunnel next month, etc.)
For most Doberman owners planning to stick with agility, individual mid-range pieces provide better long-term value than kits.
Q6: How much space do I need in my backyard?
A: Minimum 20′ x 30′ (600 sq ft) for basic equipment rotation. You won’t set up everything simultaneously—you’ll rotate 2-3 obstacles per session.
Ideal is 30′ x 50′ (1,500 sq ft) for a mini-course with 4-6 obstacles set up.
Don’t have a backyard? Join an agility club ($50-$150/year) for equipment access, rent facility time ($15-$30/hour), or use portable equipment at parks.
Q7: Should I train alone or join a class?
A: Beginners should take at least one foundation class (6-8 weeks). Here’s why:
Classes teach:
- Proper equipment introduction techniques
- Handler body language and cues
- Safety protocols
- Foundation skills before equipment
- Sequencing and course strategy
Home practice is for:
- Reinforcing skills learned in class
- Building muscle memory through repetition
- Convenient short daily sessions
Ideal approach: Take 1-2 beginner classes, then supplement with home practice using your own equipment.
Q8: How often should I train?
A: Start with 5-10 minute sessions, 2-3 times daily. As skills improve and your dog physically matures, extend to 15-20 minute sessions, 4-5 times weekly.
Important:
- Always include 1-2 rest days per week
- Don’t train on back-to-back days if sessions are intense
- Quality over quantity—one focused 10-minute session beats a distracted 30-minute session
Q9: What if my Doberman is nervous about equipment?
A: Go slower. Some dogs need weeks or months to build confidence. Never force or intimidate.
Strategies:
- Use extremely high-value rewards (real chicken, steak, cheese)
- Start at maximum distance (let dog approach at their pace)
- Break down obstacles into tiny steps (one paw on platform, two paws, etc.)
- Consider working with a trainer experienced with fearful dogs
- Celebrate every tiny success
Confidence-building can’t be rushed. Patient dogs often become the most reliable competitors.
Q10: Can older Dobermans (5+ years) start agility?
A: Yes, with vet clearance and modifications:
Considerations:
- Full health screening (cardiac, orthopedic)
- Keep jump heights lower (12-16 inches instead of 24 inches)
- Focus on low-impact obstacles (tunnels, platforms)
- Emphasize fun over speed
- Watch for signs of fatigue or discomfort
Many senior dogs LOVE the mental stimulation of agility, even if they can’t compete at championship levels. Adjust expectations and enjoy the journey.
Conclusion & Next Steps
You now know more about Doberman agility starter equipment than 95% of dog owners who Google “agility equipment” and drown in generic advice. You understand your breed’s unique needs, safety considerations, budget options, and training approach.
Let’s recap the essentials:
✅ Dobermans need breed-specific considerations: Cardiac screening, growth plate timeline, joint-friendly equipment, weight capacity requirements
✅ Start with the “Core 4”: Adjustable jumps (2-4), tunnel (24″ diameter, 15-20 feet), weave poles (6-12), pause table (36″x36″)
✅ Budget realistically: $150-$300 (testing interest), $400-$700 (serious hobbyist—sweet spot), $800-$1,500+ (competition-ready)
✅ Safety is non-negotiable: Vet clearance, proper warm-up/cool-down, age-appropriate progression, quality surfaces
✅ Foundation first: Master obedience, focus, and impulse control before introducing equipment
Your Action Plan:
Step 1 (This Week): Schedule cardiac screening and orthopedic evaluation with your veterinarian. Get clearance before proceeding.
Step 2 (Week 2-4): While waiting for vet appointments, work on foundation skills. Practice focus, recall, body awareness, and impulse control. These are free and don’t require equipment.
Step 3 (Month 1): Assess your space and budget. Choose your equipment tier. If starting budget-friendly, purchase or DIY 2 jumps first.
Step 4 (Month 1-2): Search for local beginner agility classes. Most run 6-8 week sessions. Sign up even if you don’t have equipment yet—classes provide access to obstacles and expert instruction.
Step 5 (Month 2-3): Add tunnel to your equipment collection. Begin foundation training on jumps (low height) and tunnel enthusiasm.
Step 6 (Month 3-6): Add weave poles and pause table. Continue progressing jump height gradually based on your dog’s skill and age.
Step 7 (Month 6+): Refine skills, increase difficulty, consider first competition or continue as backyard hobby.
Remember: Agility is a journey, not a destination. Some dogs compete at the national level; others enjoy backyard fun with their families. Both are equally valid. The goal is strengthening your bond with your Doberman while providing crucial mental stimulation and physical exercise.
Whether you invest $150 or $1,500, the real value isn’t in the equipment—it’s in the time you spend together, the trust you build, and the joy you see in your Doberman’s eyes when they nail that weave entry for the first time.
Your Doberman was born to move, think, and partner with you. Agility lets them do all three.
Now get out there and start training. Your dog is waiting.